Day 5 Task: Advanced Linux Shell Scripting for DevOps Engineers with User management Day 5


Table of contents
Advance Bash Shell Scripting Course Overview
Advance Bash Shell Scripting course provides advanced level skills to help Linux users increase their performance using shell scripts. Students will learn how to create, debug, and read complex Bash shell scripts to customize their Linux enterprise systems. This advanced training will help build the requisite expertise through shell scripting to manage, operate and maintain an enterprise network using Linux/Unix.
You have to do the same using Shell Script i.e using either Loops or command with start day and end day variables using arguments -
So Write a bash script createDirectories.sh that when the script is executed with three given arguments (one is directory name and second is start number of directories and third is the end number of directories ) it creates specified number of directories with a dynamic directory name.
Example 1: When the script is executed as
./createDirectories.sh day 1 90
then it creates 90 directories as day1 day2 day3 .... day90
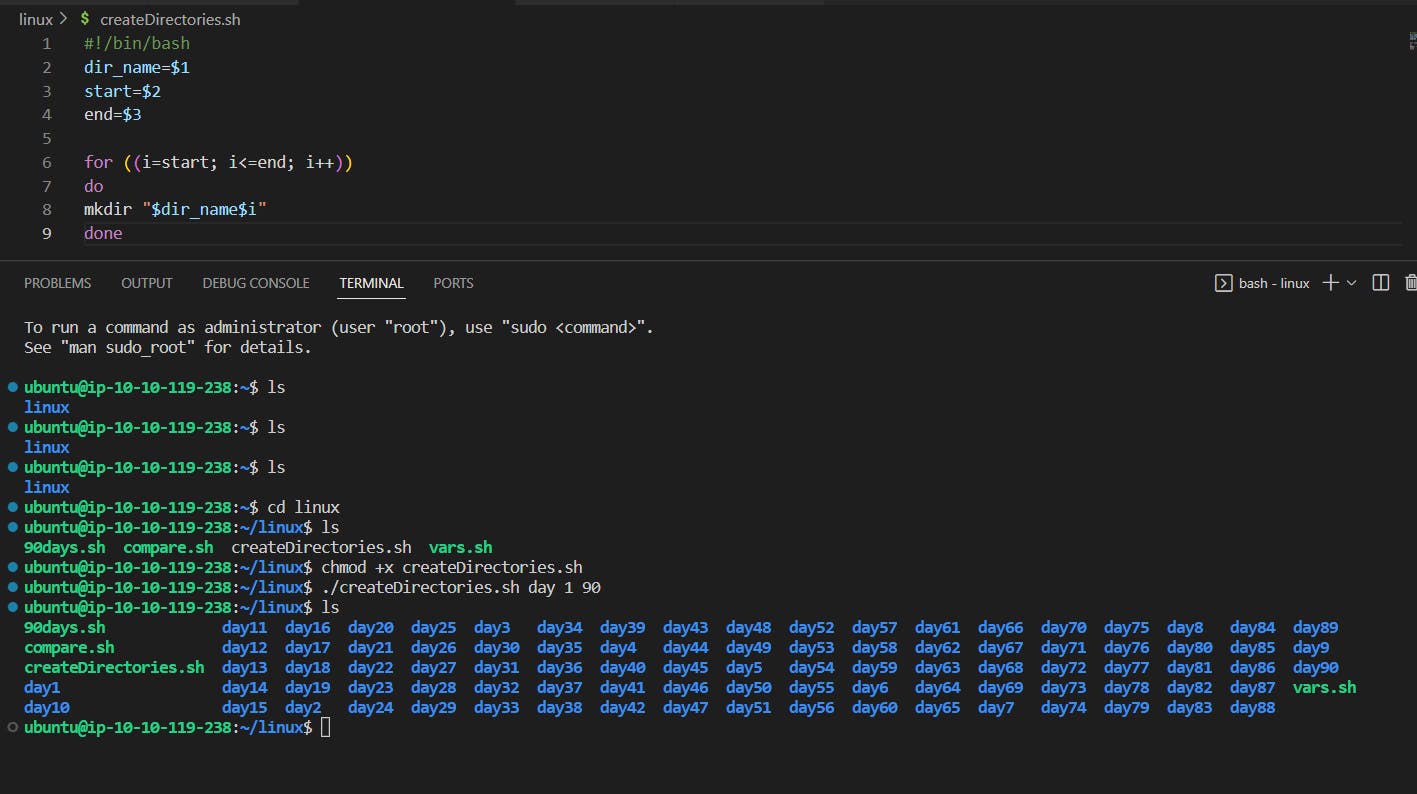
#!/bin/bash
dir_name=$1
start=$2
end=$3

for ((i=start; i<=end; i++))
do
mkdir "$dir_name$i"
done
Example 2: When the script is executed as
./createDirectories.sh Movie 20 50 then it creates 50 directories as Movie20 Movie21 Movie23 ...Movie
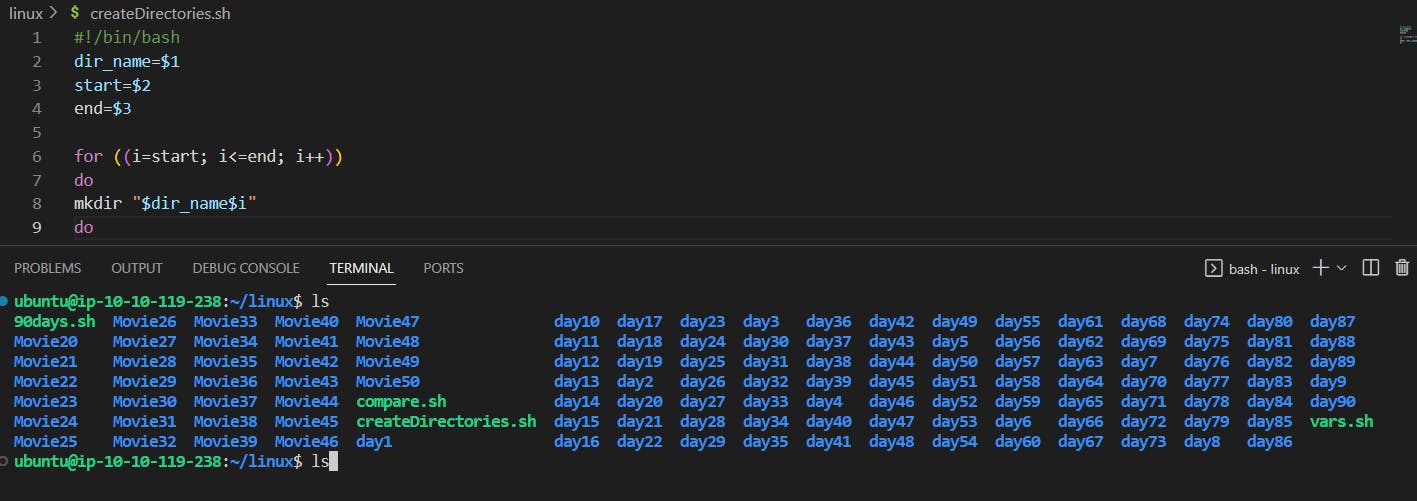
#!/bin/bash
dir_name=$1
start=$2
end=$3

for ((i=start; i<=end; i++))
do
mkdir "$dir_name$i"
do
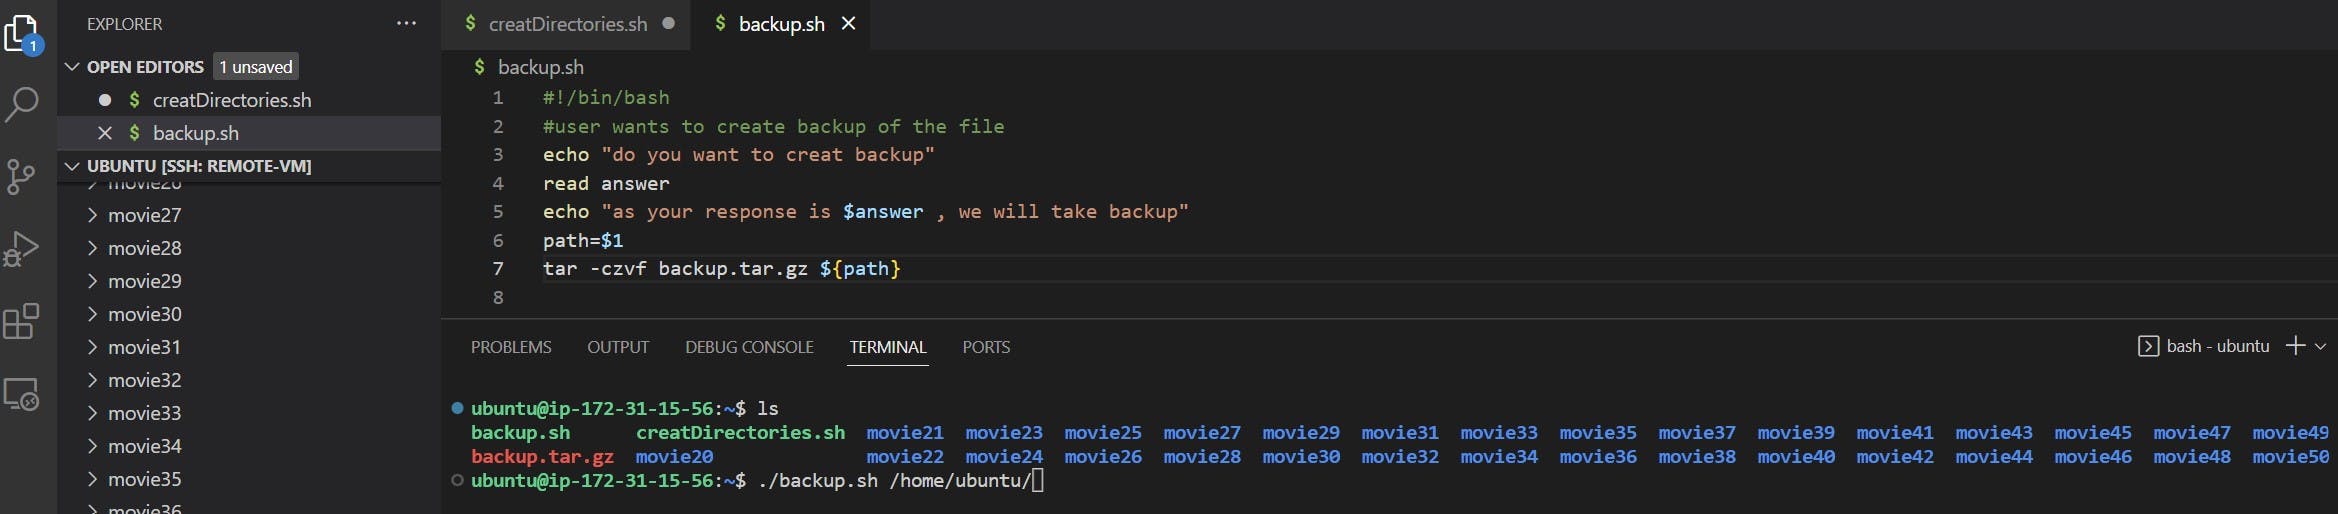
Create a Script to back up all your work done till now:
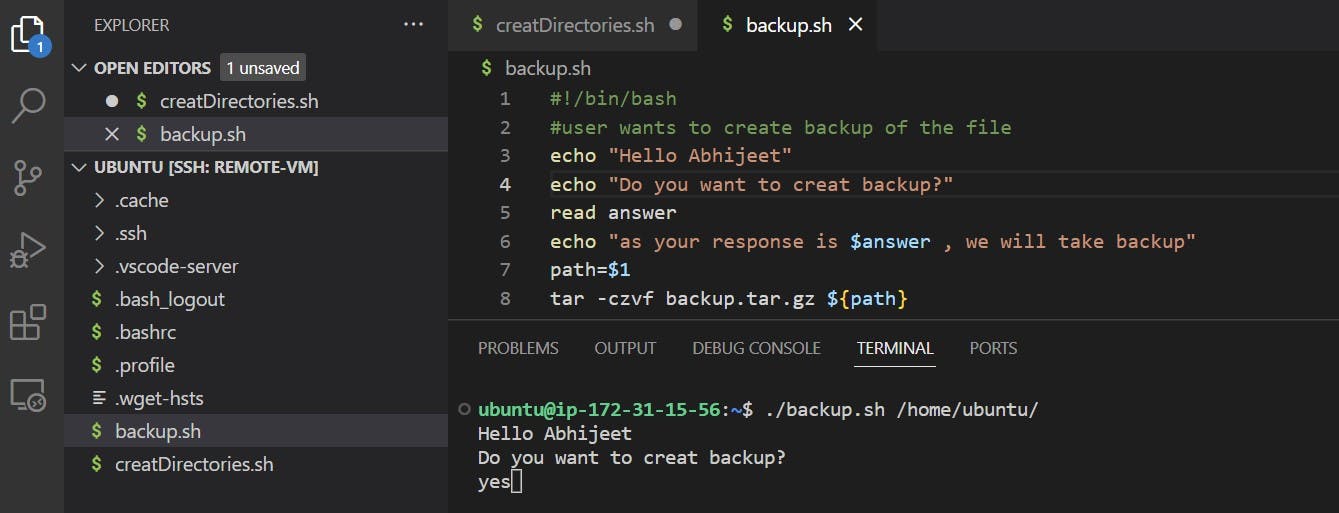
It prompts the user with a message "Do you want to create a backup?" using the "echo" command and reads the user's response using the "read" command, which stores the response in the "answer" variable.
It then echoes back the user's response with the message "as your response is $answer, we will take backup".
It takes the path to the file or directory to be backed up as an argument passed to the script, which is stored in the "path" variable.
Finally, it creates a tar archive of the specified file or directory named "backup.tar.gz" using the "tar" command with the option "-cvzf".

Finally, It creates a backup as shown below:
Cron and Crontab, to automate the backup Script:
In Linux, the "cron" daemon is a service that allows users to schedule tasks (i.e., shell commands or scripts) to be run at specific times or intervals. The "crontab" command is used to create, modify, and view the user-specific cron schedules, called "crontabs". Here's an overview of the "cron" and "crontab" commands in Linux:
Cron: The "cron" daemon is a background process that runs continuously on the system and checks the "crontabs" of all users to see if any commands need to be executed at a particular time. Cron uses a configuration file called "crontab" to manage the schedule of commands.
Some steps are written below:
Create the backup script: First, create the backup script that you want to automate. For example, let's create a script called "backup. sh" that backs up a specific directory:
Schedule the backup script with Cron: To schedule this script to run automatically using "cron", follow these steps:
Open the crontab editor by running the command "crontab -e" in your terminal.
If prompted to select an editor, choose your preferred text editor.
Add a new line to the crontab file with the following syntax:

The string 0 2 * is a cron expression that specifies when to run the command. In this case, it means "run the command at 2:00 AM every day".
0: The minute when the command should run (in this case, "0" means "at the start of the hour").
2: The hour when the command should run (in this case, "2" means "2:00 AM"). : The day of the month when the command should run (in this case, "" means "every day"). : The month when the command should run (in this case, "" means "every month").
: The day of the week when the command should run (in this case, "" means "every day of the week"). The command that follows the cron expression is /home/ubuntu/backup.sh /home/ubuntu /home/ubuntu/backup_directory. This means that the script located at /home/ubuntu/backup.sh will be executed, with /home/ubuntu as the source directory to be backed up and /home/ubuntu/backup_directory as the destination directory where the backup will be stored.
So the overall meaning of this cron job is to run the backup. sh script at 2:00 AM every day, using the specified source and destination directories.
User Management:

In Linux, user management involves creating, modifying, and deleting user accounts and groups. Here are some commonly used commands for user management in Linux:
useradd: The "useradd" command is used to create a new user account.
passwd: The "passwd" command is used to set or change a user's password.
Here are some common options for the "passwd" command:
"-l": Lock the user's account.
"-u": Unlock the user's account.
"-d": Remove the user's password.
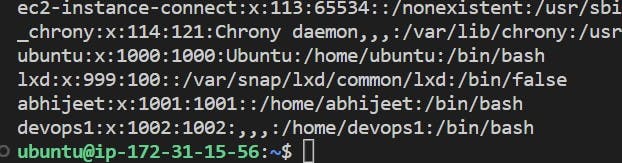
Create 2 users and just display their Usernames:

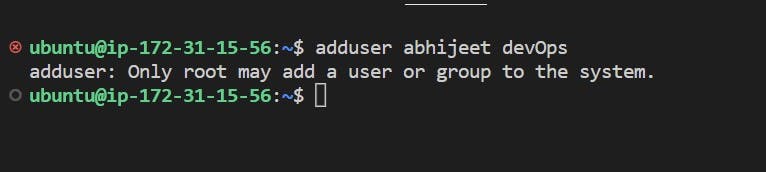
If you are an Ubuntu user and do not have permission to add a new user you can see it as a user, I don't have permission to create a user because I don't have the power of Superman, like a super user called root.
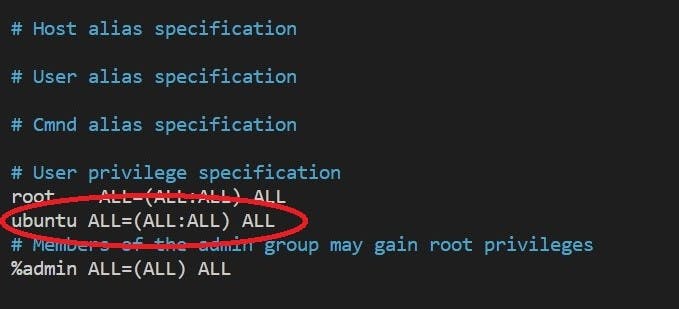
To edit the visudo file, you need to have administrative privileges on the system. This means you must be a user with the sudoer's permissions or the root user.
Assuming you have the necessary permissions, you can edit the visudo file by following these steps:
Open the terminal on your system.
Type the following command and press Enter:
COPY
COPY
sudo visudoMake the necessary changes to the file. Be very careful while editing this file, as incorrect changes can cause serious problems with your system.
Once you have made the necessary changes, save the file and exit the editor.
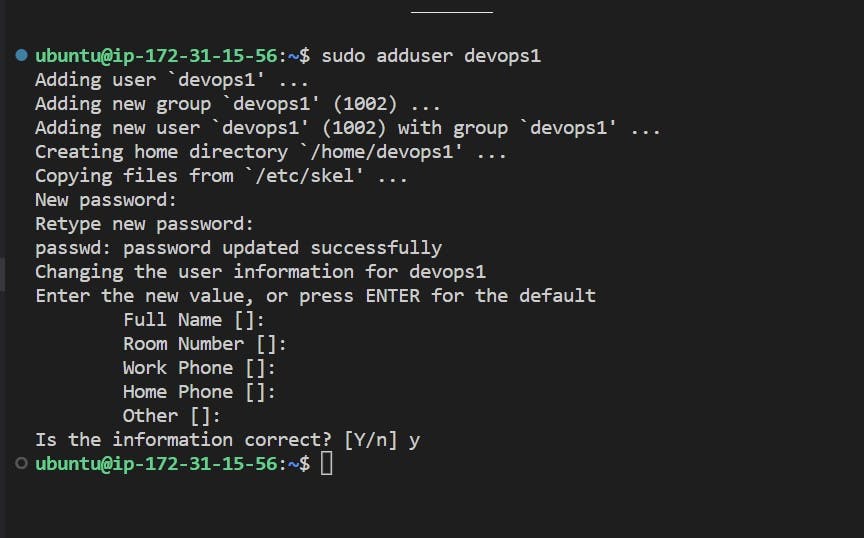
Now , try to create the user via ubuntu user.
Optionally, you can add the new user to any additional groups, such as the sudo group, by running the following command:
COPY
COPY
usermod -aG groupname username
Now, If anyone wants to see all users:
Replace "groupname" with the name of the group you want to add the user to, and "username" with the name of the user you just created.

This command will prompt a new window with all user details: